Multi-signature hardware wallets with Electrum
Hardware wallets are useful but they’re not a panacea. Vulnerabilities have been found in them before and will continue to be found. If you use a single hardware wallet, your private keys could be extracted if it is stolen. Worse still, a remote access vulnerability could be found.
Therefore, it is a good idea to use multiple vendors and many people recommend using them as a multi-signature wallet. This provides a balance of convenience, with security that vulnerabilities found in one will not compromise your wallet.
I’m also guilty of preaching this but had never actually tried this configuration, so I made this tutorial.
Honestly, the experience wasn’t great:
-
The Digital Bitbox caused Electrum to crash frequently and the mobile verification and 2FA simply didn’t work.
-
The Ledger doesn’t verify change outputs (or display fees) for multi-signature transactions, leaving it up to the user. This is a serious attack vector.
-
The TREZOR was
almostfaultless.However, despite firmware support, Electrum doesn’t support “Show on TREZOR” for multi-signature addresses. -
EDIT: As I mention below, one of my readers was absolutely awesome and fixed “Show on TREZOR” for multi-signature addresses! Sadly the change just missed the cut for 3.0.6 but, with Electrum from Git
master, the TREZOR experience is absolutely flawless.
While the Digital Bitbox and TREZOR issues aren’t faults of the hardware wallets and should be easy to fix, the same cannot be said for the Ledger attack vector. Arguably, these drawbacks mean that multi-signature is currently less secure than the standard configuration.
If you understand the risks and want to try it anyway, here is the tutorial. But remember, here be dragons.
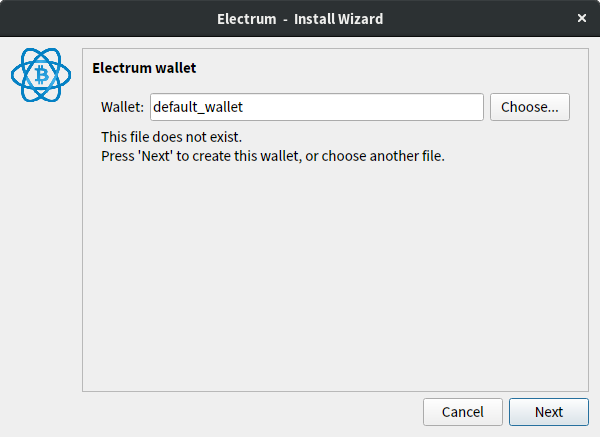
Creating the wallet
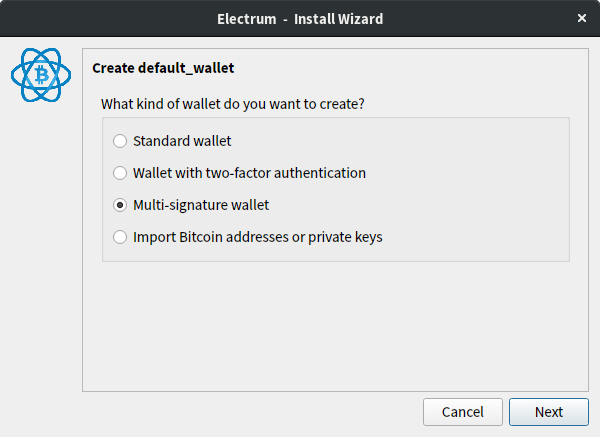
With older versions of Electrum, you could not use hardware wallets directly from a multi-signature wallet. You would have to create a multi-signature wallet and a wallet for each hardware wallet.
Newer versions of Electrum do not have this limitation, and you can create a single multi-signature wallet, with all your hardware wallets.
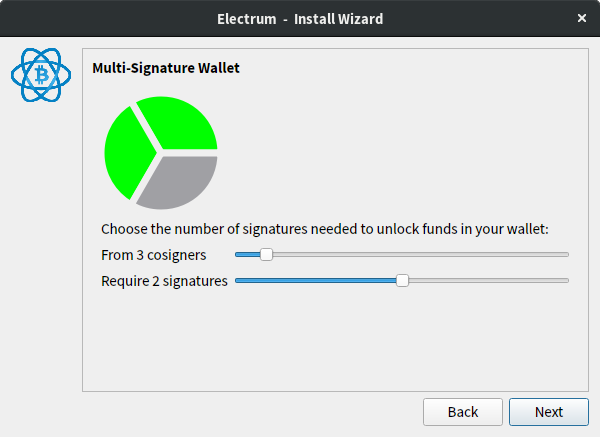
We need to decide what threshold to use for the multi-signature wallet. You need to balance convenience and security.
For example, 3-of-3 multi-signature with three hardware wallets from the same vendor that you keep in the same place will not increase security. But it makes it very easy to accidentally lock yourself out of your wallet!
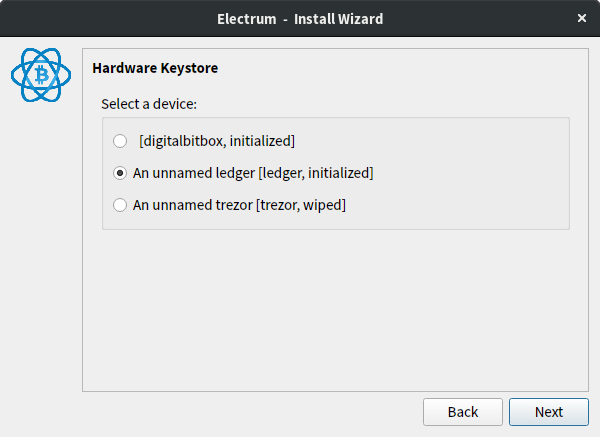
For this tutorial, I will do 2-of-3 multi-signature:
- 1 × Digital Bitbox
- 1 × Ledger Nano S
- 1 × TREZOR
Let’s add the first cosigner!
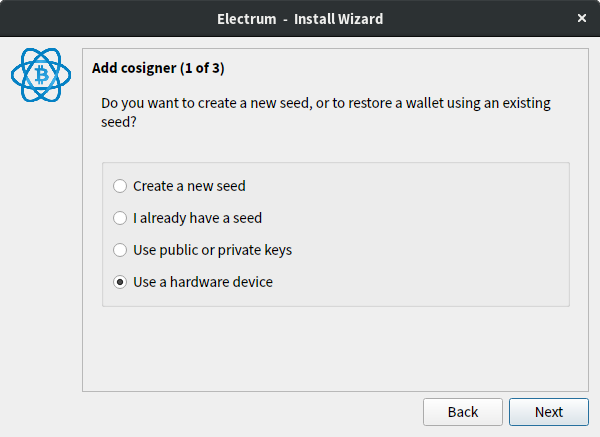
Adding cosigners
Digital Bitbox

Dependencies
You will need to use the desktop application to ensure the firmware is updated to the latest version. This was quite problematic for me, since I had quite old firmware on my Digital Bitbox.
While Electrum does not require any dependencies to interface with the device, the desktop application is also required to pair the mobile 2FA.
Once I had the latest firmware and latest desktop application, the process went much smoother.
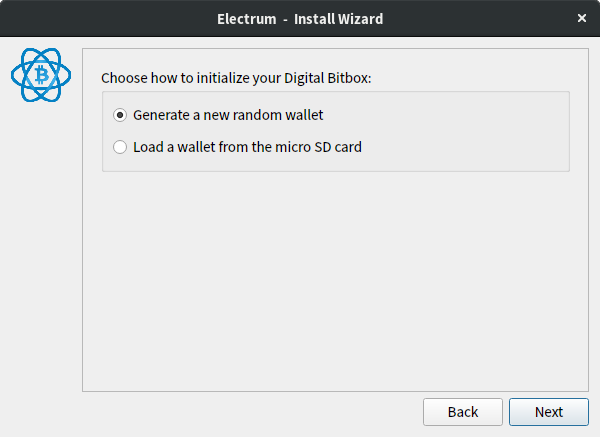
Initializing the device
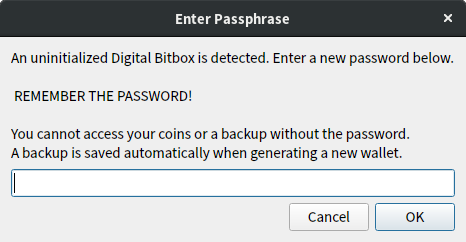
While you need the desktop application to update the firmware and use 2FA, Electrum can be used to initialize the device, if you haven’t done already.
Adding the device
Next, you can decide whether to use mobile pairing. Unfortunately, when I tried this, it simply did not work (mobile verification did not occur and, once I enabled full 2FA, Electrum couldn’t sign transactions). I did not investigate further, but I would appreciate it if readers could report their results.

One thing to note is that the Digital Bitbox frequently caused Electrum to crash. For example, whenever you create a wallet with a Digital Bitbox, it will always crash after creation. However, if you open Electrum again, you can select the new wallet from the File menu.
Ledger
Dependencies
Electrum requires the btchip
library, in order to interface with the device.
If you have installed an Electrum release from the website, it will include this dependency. Otherwise, you can use a variation of the following command.
pip3 install btchip-python
If you use the above command, make sure to restart Electrum so it can detect it has been installed.
Adding the device
Unlike the other two hardware wallets, the Ledger is initialized on the device, without a computer (unless you explicitly use a different method). Therefore, there is no need to initialize the device from Electrum.
If you see the following error, this means you either don’t have the Bitcoin application installed on your device, or you don’t have it open on the device.
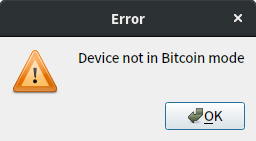
Unfortunately, to install the application, you have to check-in with Ledger’s
HSM server which has some privacy implications. Also, while it is seemingly
possible to use ledgerblue
to install it from the command-line, there are no instructions for this.
Therefore, you need to use Ledger Manager to install the application.
Alternatively, you can build the application from source code but I don’t think you can verify your build against the official application, so you could be vulnerable to malware by doing so.
TREZOR
Dependencies
Electrum requires the trezorlib
library, in order to interface with the device.
If you have installed an Electrum release from the website, it will include this dependency. Otherwise, you can use a variation of the following command.
pip3 install trezor
If you use the above command, make sure to restart Electrum so it can detect it has been installed.
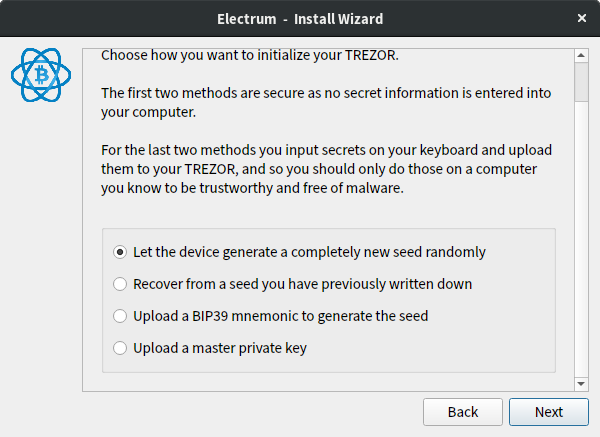
Initializing the device
Using the TREZOR with Electrum is a simple, intuitive process. Not only can you initialize the device entirely from Electrum, you have access to almost all of the functionality provided by the device (by clicking the icon in the bottom corner of Electrum, once you have created the wallet).
Using XPUBs
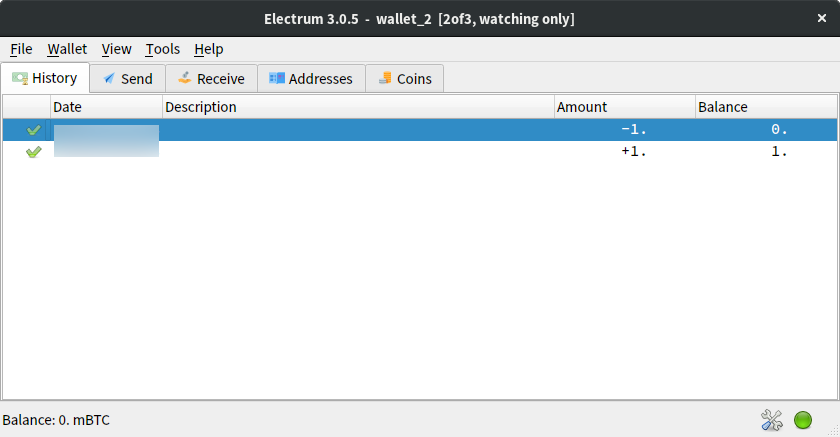
XPUBs can be used to create watch-only wallets or to add cosigners you don’t have the private keys for.


As you can see below, if you create a wallet with only XPUBs, you can use it as a watch-only wallet.
Using a multi-signature wallet
Backing up the wallet!
If you lose some of the hardware wallets and recovery seeds, you will not be able to recover your funds unless you have the XPUBs for the missing cosigners.
For this reason, it is essential to backup your Electrum wallet file. You can do so from File → Save Copy (Ctrl-Shift-S).
Using the wallet
When you open the wallet, Electrum will attempt to connect to the hardware wallets. If it fails to connect to a device, you can skip that device. You will still be able to sign transactions as long as you have the required number of devices connected.
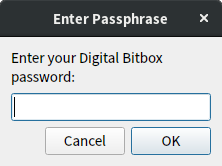
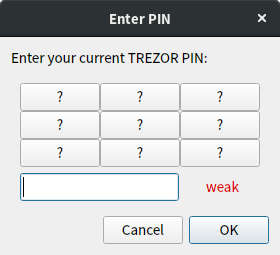
If you have a Digital Bitbox connected but not unlocked, you will need to enter the passphrase.
And the same applies to the TREZOR.
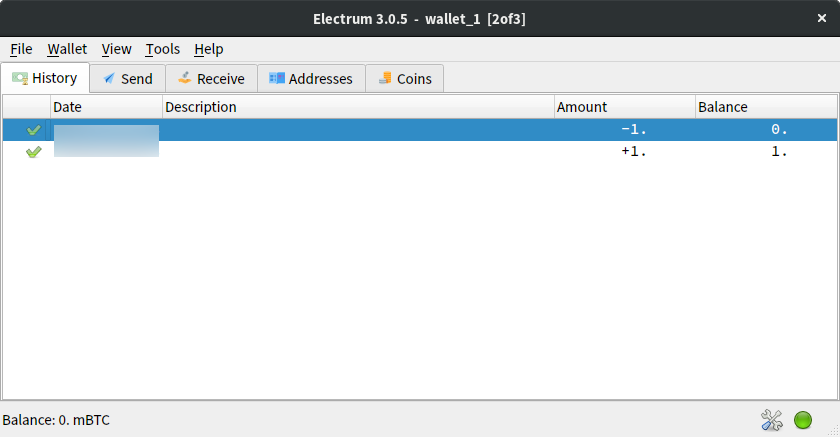
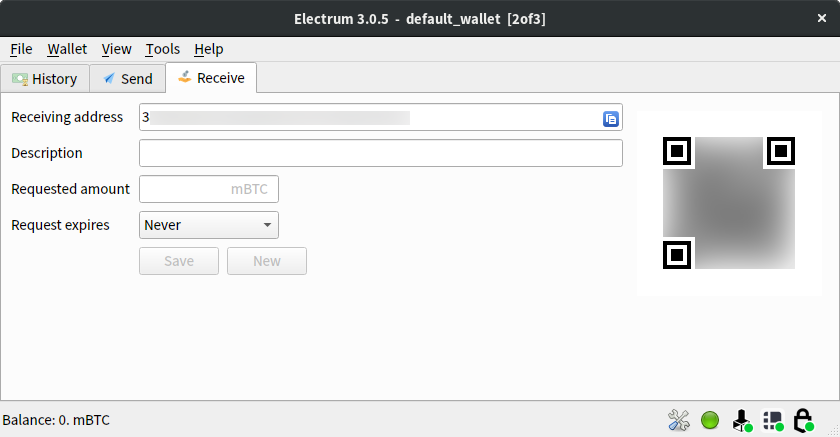
The actual multi-signature wallet, for the most part, functions like a normal Electrum wallet. The main difference is that the wallet will generate addresses starting with a 3, otherwise known as P2SH addresses.
You may recognize these from wallets supporting SegWit. However, this multi-signature wallet does not have SegWit because Electrum does not support SegWit multi-signature wallets at this time.
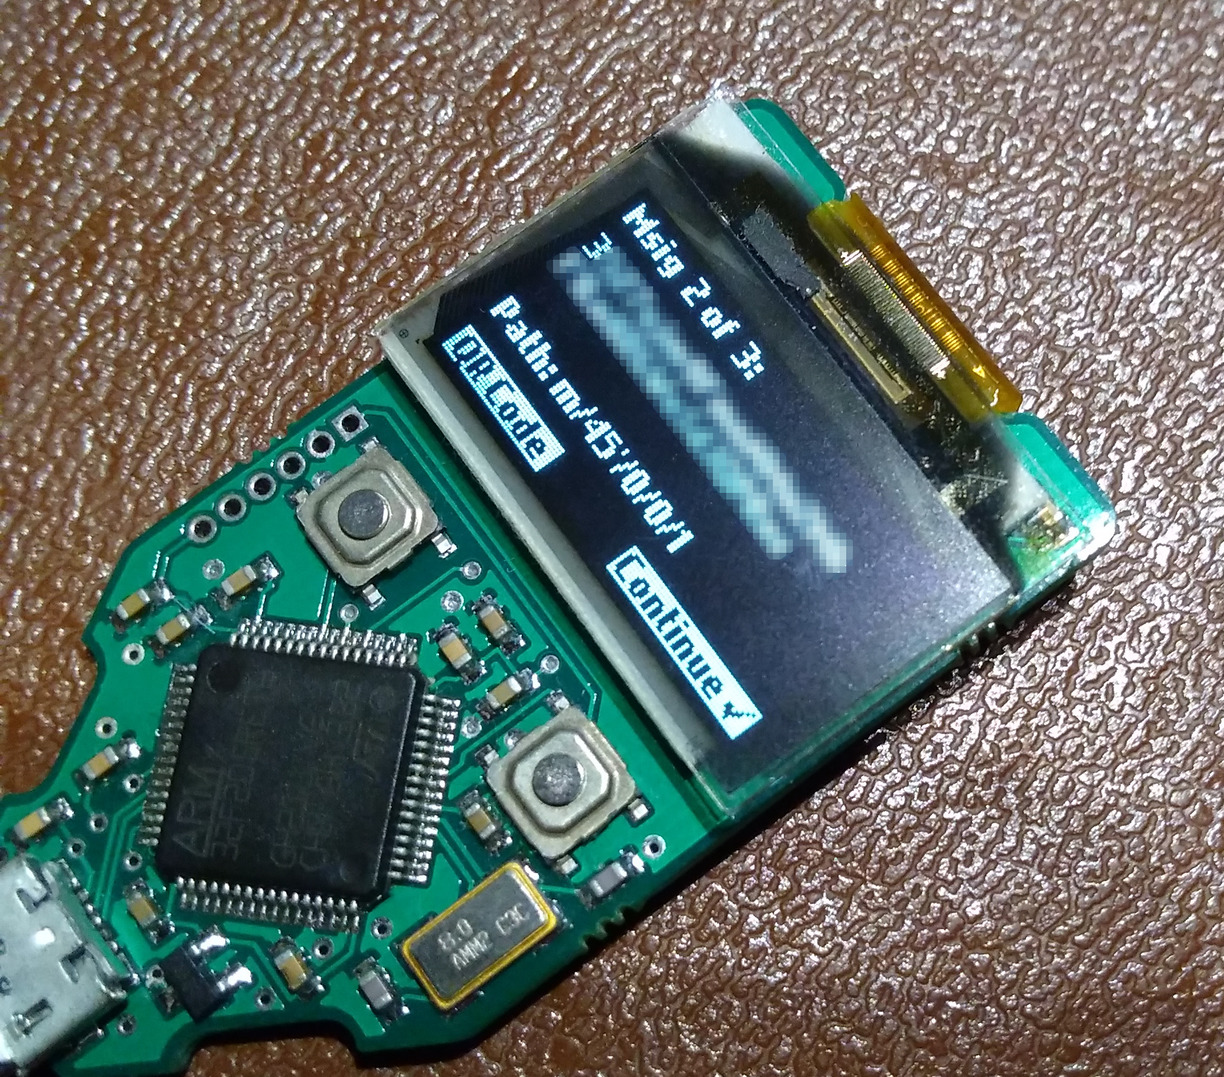
One issue to note is that Electrum does not support “Show on TREZOR” for
multi-signature addresses (despite the firmware having support for securely
doing so). I intend to file an issue for this and perhaps try and resolve it.
EDIT: One of my readers was absolutely awesome and fixed “Show on TREZOR” for multi-signature addresses! Unfortunately, this just missed the cut for 3.0.6, but it should be available in Electrum 3.1.
They were also awesome enough to have the description changed from the ambiguous “Msig” to “Multisig”.
On the other hand, the Ledger firmware does not support securely displaying multi-signature addresses and this should also be resolved.
As you can see below, even with no devices connected, you can use it as a watch-only wallet.
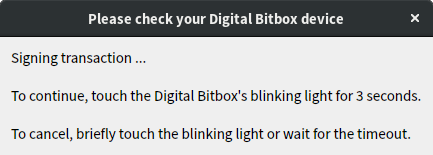
Signing transactions
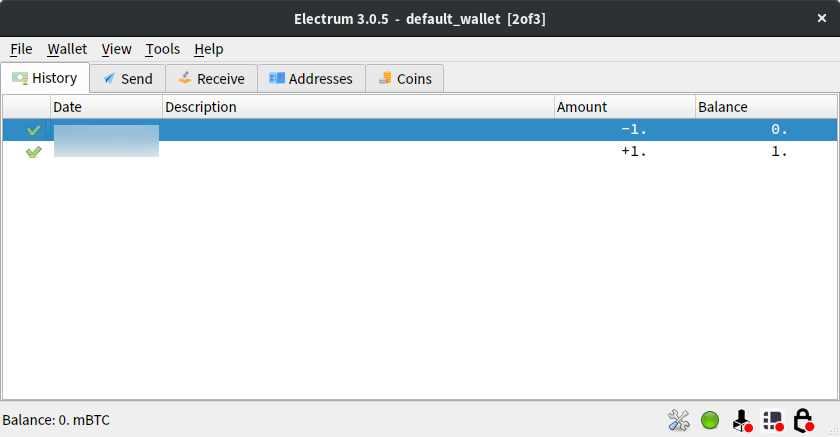
Transaction signing with multi-signature wallets is a very smooth process.
Electrum will try the hardware wallets in order and ask you to confirm the transaction on each device it finds until you have the required number of signatures.
As I mentioned earlier, the mobile verification and 2FA simply did not work. However, the experience without it was quite smooth.
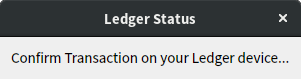
For the Ledger, the experience is definitely less than perfect. Because the
device does not verify the change address, the device displays UNKNOWN FEE
and requires you to check the change output yourself. This is a dangerous
attack vector for malware to modify the change output and steal your funds. You
can find
justification
from the CTO but it is less than adequate and should be resolved.
On the other hand, TREZOR gives you the same smooth and secure experience that you get with normal transactions.
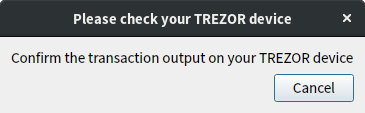
This is because the device requires the wallet software to provide it with all the XPUBs, which allows it to verify that the change address is owned by the multi-signature wallet. This provides increased security over the Ledger.
Restoring the wallet
If North Korea launches an EMP attack (and you, your laptop and your internet connection are miraculously still alive), you will need to recover your multi-signature wallet without your hardware wallets.
Alternatively, something more realistic might happen. Such as some or all of the hardware wallet vendors disappearing.
First, you’ll need to configure the multi-signature wallet. Make sure to select the same parameters as before, or you will end up with a different wallet.
Then you can start adding cosigners from XPUBs, recovery seeds or hardware wallets. It does not matter in which order you add cosigners in as Electrum sorts the public keys.
Using recovery seeds
You can recover your multi-signature wallet with some or all of the recovery seeds.
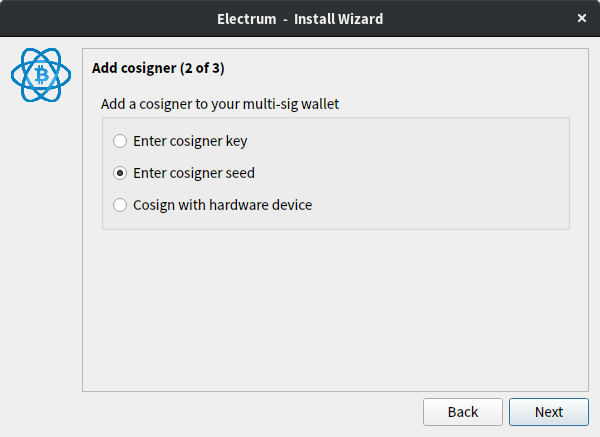
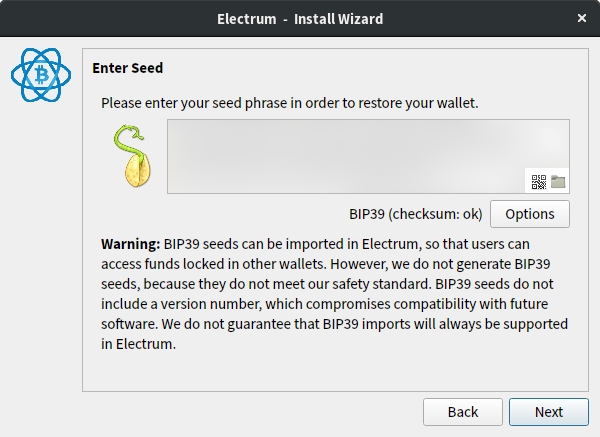
It is important to make sure that “BIP39 seed” is checked under “Options”, as Electrum defaults to incompatible Electrum seed phrases.
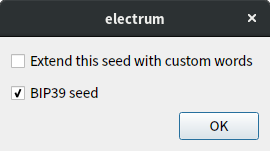
Then you can enter your recovery seed and you should see “BIP39 (checksum: ok)”.
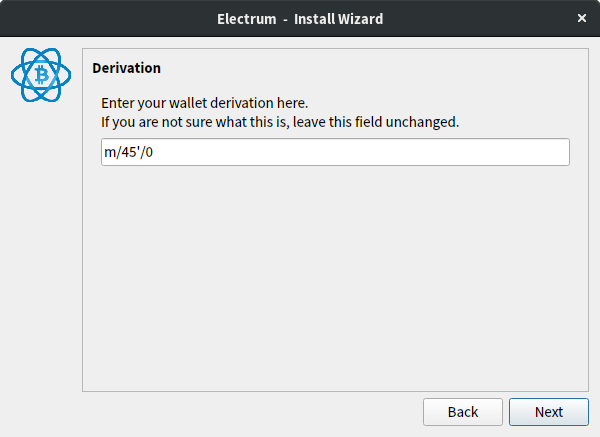
It is important to change the wallet derivation in the next step. Electrum will
default to m/44'/0'/0' (which is the wallet derivation for Bitcoin account
#1).
You need to change it to m/45'/0 (which is the derivation for multi-signature
hardware wallets).
Finally, you should see your funds. As long as you have added the required number of recovery seeds or hardware wallets, you should be able to sign transactions.